There is nothing quite like snagging a new domain and anticipating the website that you are about to build, so if you have already added your new addon domain that you have bought from a hosting provider such as hostgator then you are good to go for a WordPress quick install. But you might find that in the Hostgator Cpanel that things might be a little different and refined for a smoother experience so follow the instructions for a trouble free installation.
WordPress quick install
1.Log into hostgator cpanel.
2.Scroll down to the section: Software and services and find Quick Install. (Also the option at the top under Special services, then Get started with WordPress today will basically take you to the same place).
3.From the website select Install WordPress
4.Select: Install WordPress for free.
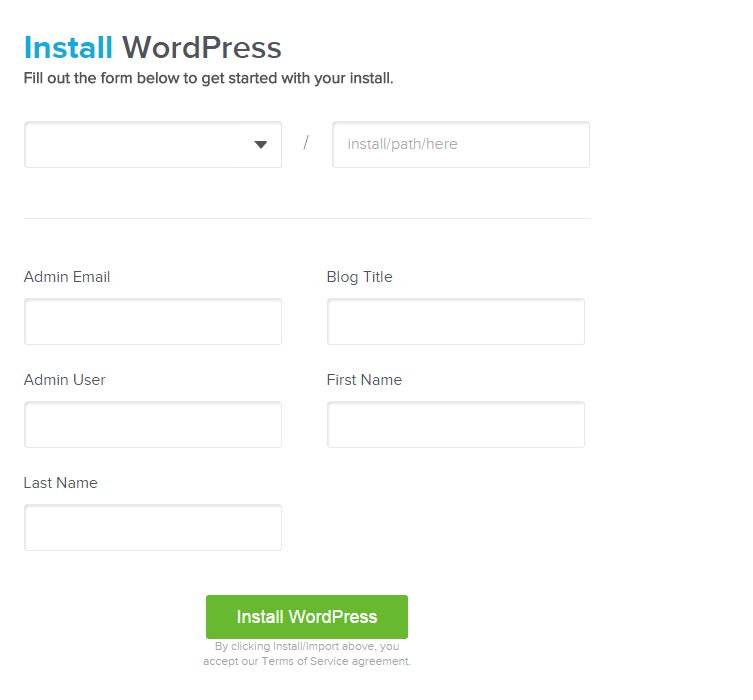
5. From the drop down box select the domain that you want or that you bought and added as a addon domain.
6. Under Blog Title Write the name of your website without the .com and write it like how you want it to appear on the webpage, fill in your admin user name, e-mail and your first and last name.
7. Next install WordPress by hitting the bright green button. You will be emailed when the installation is complete or notified from the page you are currently on in a minute or two.
8. You will be given a Password that’s generated automatically, I suggest that you change the WordPress password to something you can remember and that’s secure.
Congratulations you have now installed wordpress on your domain using the hostgator cpanel that makes things very easy for you and all you needed was a few tips from me to help you a bit, do share this article it helps out a bunch and is an ideal way to share the love and the time I have put into this article and do leave a comment below my friend or consider subscribing to the blog.


